How to Install MongoDB on Docker
 For fast & experimental use of MongoDB, running it on docker is a pretty effective way. After use, you can easily just delete the instance. Here’s a procedure to setup a mongo instance on docker locally & test connection, & browse it.
Install steps
- Find the latest version of MongoDB image on docker hub. Use this link https://hub.docker.com/mongo to go its default page.
- Click on tags on the page and find the latest release tag matching your OS architecture e.g linux or windows. Once you find one, copy the docker command on the right of the release.
- Open a terminal or prompt to pull/download the image. See example below.
docker pull mongo - When pulling the image completes, you should be able to see it on your local docker dashboard under images.
- Click run image, and an optional settings dialog will appear. Specify a container name and a localhost port for accessing the mongo instance; You can use the default & known MongoDB port
27017. See the figure below.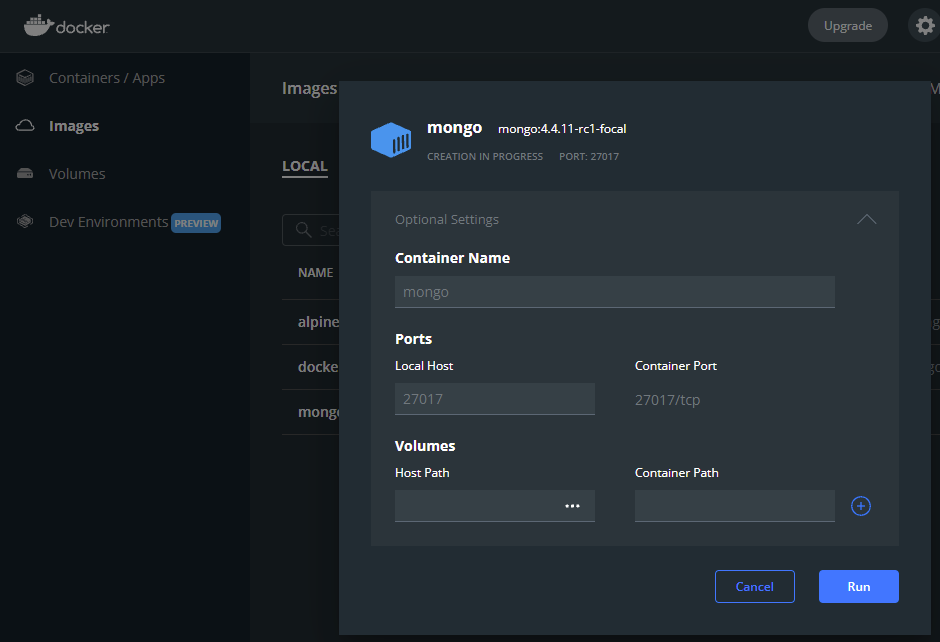
- If you now switch over to Containers/Apps, you will see the mongo docker container running.
Test Connection & Usage
Now we need a client to test the docker instance and also for browsing & exploring the database.
The fastest & easiest tool by far is MongoDB for VS Code extension.

- Install the extension. You should see the mongo logo added to the bottom of the left sidenav of VS code.
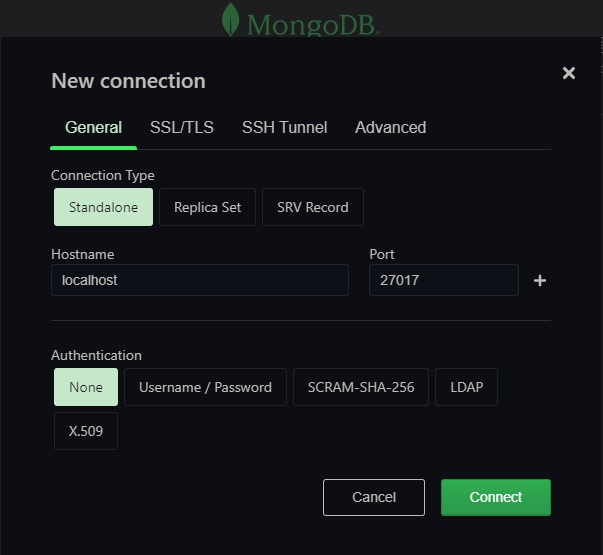
- Click on it, and a mongo panel will launch with a button for adding a connection.
- Click on “Add connection” and select open form, specify host & port as shown in the figure below to match our running docker container instance. Click connect and thats it.
Everything else from here is pretty straight forward & easy to follow, but in case you get stuck, refer to the link above for step-by-step procedures.